We Put Our Family to Work Restoring Our 170-Year-Old House
Villa Nuova
13,931 views
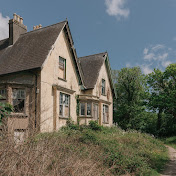
Every new job in Villa Nuova teaches us a new lesson in patience and persistence. This week was no exception as we tackled a mix of major exterior prep, crucial drainage work, and stripping back old plaster on the landing.
Outside, we had to resort to some serious horsepower to pull out a tree root that was embedding itself right at the bottom of the West façade. With that out of the way, we shifted focus to the back of the house, scraping decades of stubborn ivy off the walls. Luckily, extra hands arrived just in time with Gauthier's Mam visiting for the week, we teamed up to paint the exterior of the old bootroom and washroom, before mounting cast aluminium rainwater goods.
With Gauthier's brother visiting too, we put him straight to work on groundworks around the perimeter. We laid new drainage pipes to carry rainwater away from the foundation and poured a shoe all around the house to protect the original stone footings. (Safe to say it took an impressive amount of lubricant to get all those pipes clicked together! 😉)
Finally, inside the house, we continued the dusty task of hacking away the dense cement render to let the stone walls breathe again.
Thank you so much for following along on this journey, taking the slow road with us, and helping us bring Villa Nuova back to life.
TIMESTAMPS:
0:00 - Introduction
1:40 - Scraping Ivy from the Back Extension
2:38 - Preparing the Walls Before Painting
3:58 - Timelapse of the Paint Work
5:40 - Installing the Rain Water Goods
6:42 - Removing the Cementer Render on the Top Landing
8:10 - An Afternoon at the Kerry Cliffs (Skellig Islands)
9:43 - Preparing to Pour the Footings
10:20 - Pouring the Footings
12:22 - Installing the Rain Water Drains
👋 FOLLOW OUR JOURNEY ON SOCIAL MEDIA:
Instagram: @villa_nuova_
Music from #InAudio:
https://inaudio.org/track/PastMoments
https://inaudio.org/track/DailyShortV...
20 Comments

I think new plaster is great if you're painting. Keep it up guys its going to be a lovely home for you
We Put Our Family to Work Restoring Our 170-Year-Old House
Villa Nuova
13,931 views
Every new job in Villa Nuova teaches us a new lesson in patience and persistence. This week was no exception as we tackled a mix of major exterior prep, crucial drainage work, and stripping back old plaster on the landing.
Outside, we had to resort to some serious horsepower to pull out a tree root that was embedding itself right at the bottom of the West façade. With that out of the way, we shifted focus to the back of the house, scraping decades of stubborn ivy off the walls. Luckily, extra hands arrived just in time with Gauthier's Mam visiting for the week, we teamed up to paint the exterior of the old bootroom and washroom, before mounting cast aluminium rainwater goods.
With Gauthier's brother visiting too, we put him straight to work on groundworks around the perimeter. We laid new drainage pipes to carry rainwater away from the foundation and poured a shoe all around the house to protect the original stone footings. (Safe to say it took an impressive amount of lubricant to get all those pipes clicked together! 😉)
Finally, inside the house, we continued the dusty task of hacking away the dense cement render to let the stone walls breathe again.
Thank you so much for following along on this journey, taking the slow road with us, and helping us bring Villa Nuova back to life.
TIMESTAMPS:
0:00 - Introduction
1:40 - Scraping Ivy from the Back Extension
2:38 - Preparing the Walls Before Painting
3:58 - Timelapse of the Paint Work
5:40 - Installing the Rain Water Goods
6:42 - Removing the Cementer Render on the Top Landing
8:10 - An Afternoon at the Kerry Cliffs (Skellig Islands)
9:43 - Preparing to Pour the Footings
10:20 - Pouring the Footings
12:22 - Installing the Rain Water Drains
👋 FOLLOW OUR JOURNEY ON SOCIAL MEDIA:
Instagram: @villa_nuova_
Music from #InAudio:
https://inaudio.org/track/PastMoments
https://inaudio.org/track/DailyShortV...