The Ultimate Pottery Handle Pulling Guide — A Beginner's Guide
Florian Gadsby
67,676 views
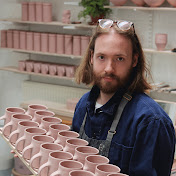
This week I'm revisiting another old tutorial, revamping it entirely to hopefully make the complicated process of pulling handles much easier, as ultimately, it is a rather straightforward technique, but there are lots of small details, both before attaching and pulling the length of clay, and after, that make a big difference in terms of how successful they'll be. There's A TON of information in this video, but I hope it helps you create handles for your pots that you love.
Thanks so much for taking your time to watch, I appreciate it.
📖 • ORDER MY BOOK: https://geni.us/bymyhands
🏺 • You may also be interested in my 'A Beginner's Guide' series, which you can find here: How to Throw a Pot — A Beginner's Guide
Timecodes:
0:00 - Introduction
0:51 - Trimming the mugs and making sure the clay is in the RIGHT condition.
5:22 - How soft should the clay that's being pulled be?
6:17 - HAND POSITIONS
8:14 - How much pressure to use & pulling the blanks
10:18 - Segmenting off the individual handle blanks
13:01 - The orientation they're attached & the desired cross-section
14:08 - Flaring out the end of the blank
15:17 - How to attach the blanks to the cups
18:27 - How to avoid two common pulling errors
22:09 - How to arch the handle down & join it to the body
24:58 - Pulling the grooves in the back of the handle
26:17 - Don't overwork the clay
27:07 - HOW TO DRY THEM PROPERLY
28:03 - How to use wax to prevent cracks
28:30 - Pulling a handle that's TOO large
28:53 - Pulling a handle that's TOO small
29:25 - Pulling a successful handle with no edits
32:37 - Trimming away smeared clay on the base & rounding the rim.
34:19 - Clean up
•
Find out much more via the link below!
https://linktr.ee/floriangadsby
•
Get in touch here: https://www.floriangadsby.com/contact
•
💌 • Sign up to my newsletter here: https://www.floriangadsby.com/newsletter
20 Comments

I love your no-bs, professional style with which you deliver your experience. Your script and prep-work for this video must have been so elaborate for especially this process and your care and attention to detail came through all the way.
I used to make handles cut from slabs. Easier, but ugh, they never felt right. So I’m practicing with pulling handles now - the first ones are clunky looking but I was happy with how they felt in the hand after everything was fired. The next one will be the 6th. Need to make some more pots first though 😂
The Ultimate Pottery Handle Pulling Guide — A Beginner's Guide
Florian Gadsby
67,676 views
This week I'm revisiting another old tutorial, revamping it entirely to hopefully make the complicated process of pulling handles much easier, as ultimately, it is a rather straightforward technique, but there are lots of small details, both before attaching and pulling the length of clay, and after, that make a big difference in terms of how successful they'll be. There's A TON of information in this video, but I hope it helps you create handles for your pots that you love.
Thanks so much for taking your time to watch, I appreciate it.
📖 • ORDER MY BOOK: https://geni.us/bymyhands
🏺 • You may also be interested in my 'A Beginner's Guide' series, which you can find here: How to Throw a Pot — A Beginner's Guide
Timecodes:
0:00 - Introduction
0:51 - Trimming the mugs and making sure the clay is in the RIGHT condition.
5:22 - How soft should the clay that's being pulled be?
6:17 - HAND POSITIONS
8:14 - How much pressure to use & pulling the blanks
10:18 - Segmenting off the individual handle blanks
13:01 - The orientation they're attached & the desired cross-section
14:08 - Flaring out the end of the blank
15:17 - How to attach the blanks to the cups
18:27 - How to avoid two common pulling errors
22:09 - How to arch the handle down & join it to the body
24:58 - Pulling the grooves in the back of the handle
26:17 - Don't overwork the clay
27:07 - HOW TO DRY THEM PROPERLY
28:03 - How to use wax to prevent cracks
28:30 - Pulling a handle that's TOO large
28:53 - Pulling a handle that's TOO small
29:25 - Pulling a successful handle with no edits
32:37 - Trimming away smeared clay on the base & rounding the rim.
34:19 - Clean up
•
Find out much more via the link below!
https://linktr.ee/floriangadsby
•
Get in touch here: https://www.floriangadsby.com/contact
•
💌 • Sign up to my newsletter here: https://www.floriangadsby.com/newsletter